It often happens that a bra pattern doesn't offer all sizes, especially when you go outside the so-called "standard" sizes.
However, with a few notions of gradation and a good understanding of the construction of the model, it is perfectly possible to adapt an existing pattern to a size that is not on the table.
The aim of this article is to provide step-by-step guidance for those wishing to pattern a new size. We'll look at how to identify the pattern's grading logic, adjust the different pieces and check the consistency of the result.
Please note that this article does not cover the techniques for adjusting the pattern to your measurements and morphology, but only how to make new sizes outside the size chart.
This article focuses on generalities, but be aware that every pattern is based on a list of supplies and a shape (style) which can influence the grading and design parameters. I therefore strongly advise you to make a prototype after patternmaking to validate or even adapt the pattern obtained. And this is even truer for large sizes, very large cups, small and large backs.
To support this article, I'm going to suggest that you work from the LILLY bra pattern. An example will be much easier to follow and understand.
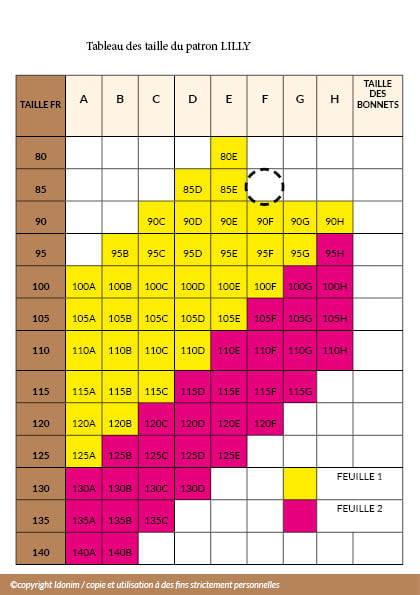
- Identify the size to create
Example: we are going to create size 85F
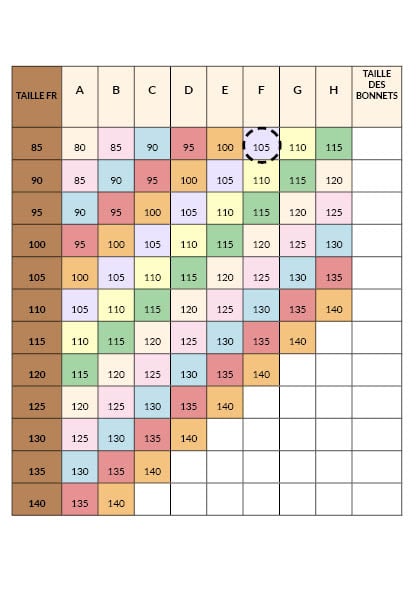
- Identify the "twin" size using the table below
- Underwiring and cups
The underwire and cups will be identical to the underwire and cup parts of the twin size.
In our case, the frame will be a regular frame size 105.
The 3 pieces of each cup will be size 105 (equivalent/same volume as a size 105B cup).
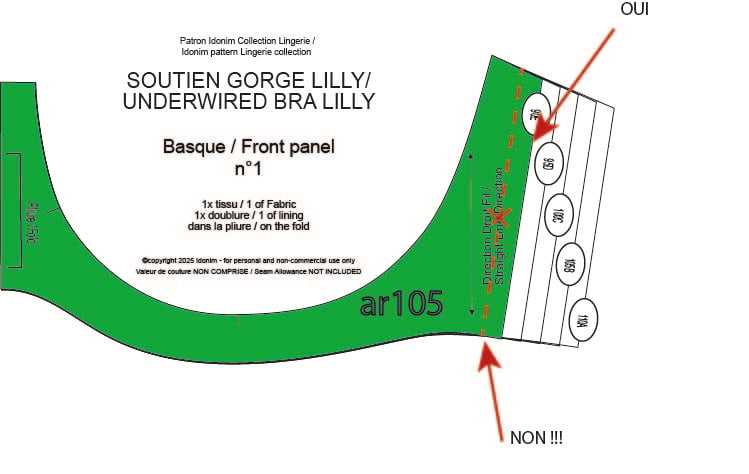
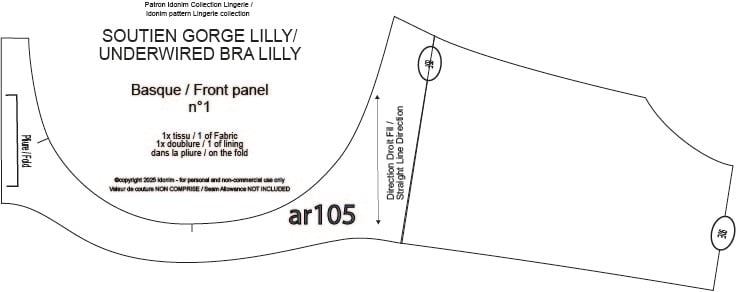
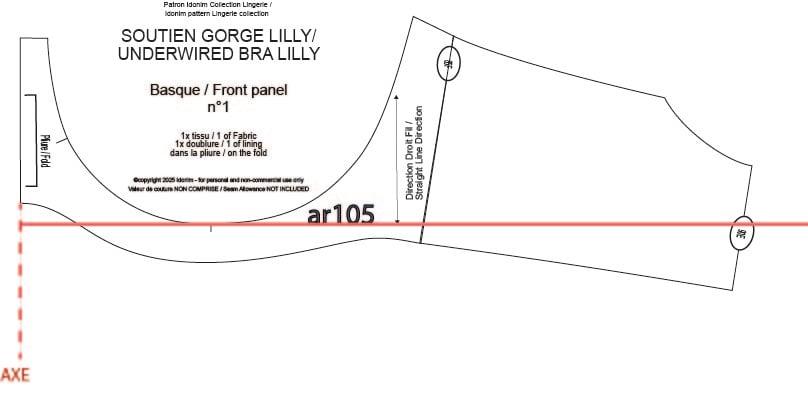
All modifications to the basque and back straps will be made using the parts named ar105 on the pattern, i.e. the parts corresponding to frame 105.
- The modification of the Basque
Don't reduce the width of the basque, otherwise you won't be able to position the frame cover when you sew it on.
Part 90E will become your part 85F
- The modification of the back band
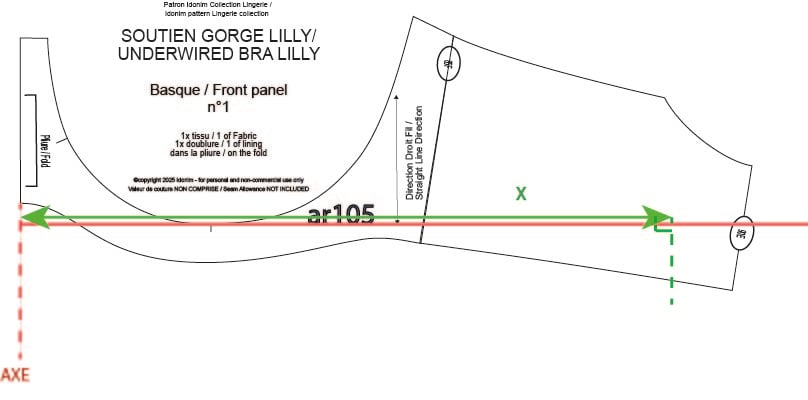
Step 1: select the 90E back band (corresponding to the 90E basque) and join it to the basque as shown below.
Step 2: draw a straight line perpendicular to the axis (centre front) and passing through the bending point of the bonnet assembly line.
Step 3: Calculate the corrected under-chest measurement, including the stretch of the back band and the size of the clip used.
X (corrected underbust) = (underbust -4) x 0.85 /2
Draw a point at distance X on the line shown in red above.
Then draw a vertical line through the end of line X
Step 4: trace the assembly line of the staple - in our case 57mm for a 3×3 staple.
and reposition the strap position to 1/3 of the armhole line
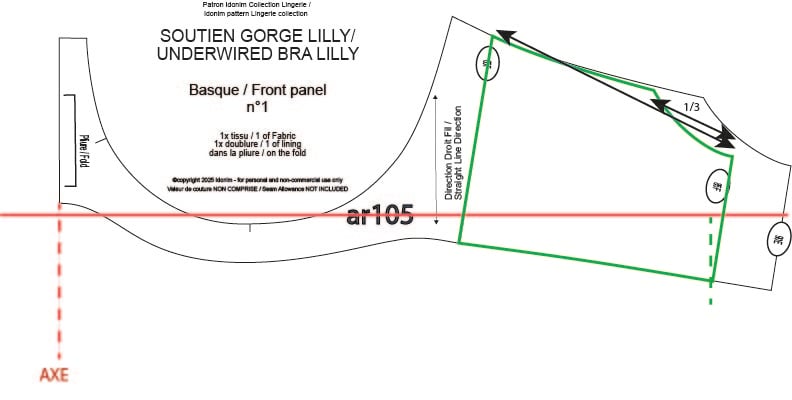
This will give you the new back band corresponding to your size; in our case 85F.
